Bin Cages Made Easy!
From Hamster Central WIKI
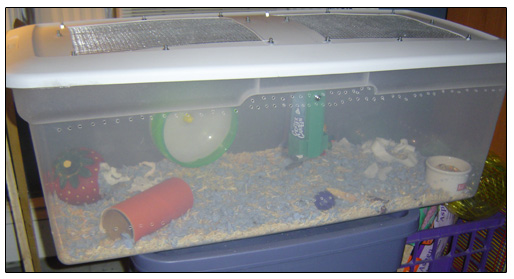
My hamsters live in large bin cages, and I consider these cages to be far superior to all others, except in the matter of space concerns. If space is a problem for you, go with a wire or aquarium style cage. For those of you willing to construct your own cage (or sweet-talk a loved one into doing it for you!), here are the instructions (refer to the pictures as a guide):
You will need:
- A large clear plastic bin with a snap-on lid (I use 90 quart Sterilite boxes from Wal-Mart…they’re huge and cheap, at less than $10)
- Small gauge wire mesh (also called hardware cloth…I used a roll of one quarter-inch for my cages)
- Nuts, machine screws, and washers (if you’re using a 90 qt. bin, 16 of each will be enough)
- A fully charged electric drill with a drill bit set
- A wrench (size compatible with hardware)
- A marker or pen
- A ruler
- Wire cutters
- A utility knife with a fresh blade
It’s probably a good idea to do this outdoors, if you can, but if not, do it in a safe area of your home or apartment. I assume no responsibility for injury received while undertaking this project…BE CAREFUL and TAKE YOUR TIME.
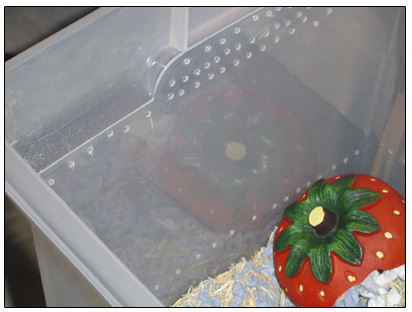
First, drill holes in the side of your bin. Use a small bit for the drill (1/8 to 1/4 inch size), and GO SLOW so you don’t crack the plastic. Drill a row of holes all around the cage at the hamster’s nose level, to promote airflow, and several rows of holes at the top. You can drill as many as you want (and more is better for ventilation), but don’t make them too close together or the plastic may crack.

After you drill the holes, it’s time to construct the cage lid. First, measure your lid and draw lines as a guide to cut. We remove most of the plastic out of the lid, but we do it in two square sections and leave enough plastic around the holes (and between them…4 inches!) to maintain the integrity and stability of the lid.
Cut the holes using your utility knife…it’s best to do this outdoors, but you can also do it on your living room floor, if you’re careful not to cut it up! This can be slow going…be patient, be careful, and familiarize yourself with a list of handy curse words.
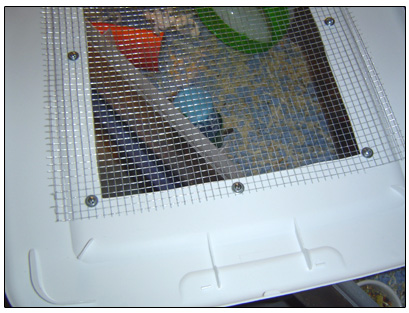
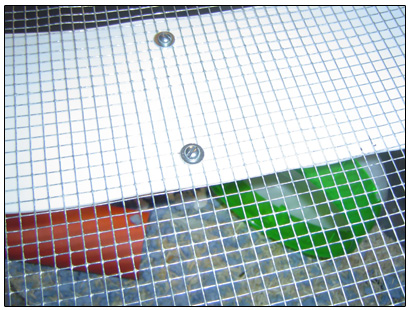
After you’ve removed the plastic from the lid, you’re ready to measure and cut the wire mesh. Use the wire cutters for this, and measure twice and cut once. Cut the wire so you have enough to cover your lid’s holes, with a little left over to be held in place by the hardware. Once you’ve fitted the mesh to the lid, you’ll need to drill the holes for the screws. Use your pen to mark the places on the lid for the screws to hold the mesh on. Use a drill bit of a compatible size with your screws. I recommend using flat-pointed screws, for your own safety, because you will need to install them with the point on the outside of the lid.
Once the holes are drilled, attach the wire mesh…it’s a good idea to have a friend or family member help you by holding the mesh in place. If your mesh has come off a roll of it, it will want to curl up on you. This makes it trickier to install, but if you install it so that the lid is convex (curved upwards) rather than concave (curved downwards), it looks and works that much better. Put the washers on the screws and thread the screws through your holes. On the top of the lid, where the screw points poke through, put the nuts on them and tighten them with your fingers.


Once all the hardware is on and the wire mesh is firmly attached, tighten the nuts with your wrench so nothing comes loose. Now, step back and admire your work! Impressive, isn’t it? Now it’s time to sweep up the plastic bits, clean out the bin with a wet paper towel, and put the bedding, food, and toys into your hamster’s new home.

By forum member hereticalhistorian

