Hello!

I have postponed this for too long, but I finally had some time on my hands and decided to post pictures from Cupcake's house project.
It was long, but it was fun to do and of course my boyfriend helped a lot(he's just gifted when it comes to building and planning...unlike me

)
So here goes!!!
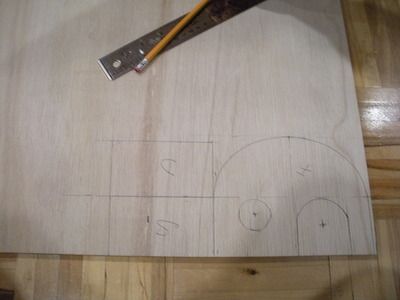
This was the plan. We drew the front of the house, with the two sides. The back panel is identical except for the door and window.
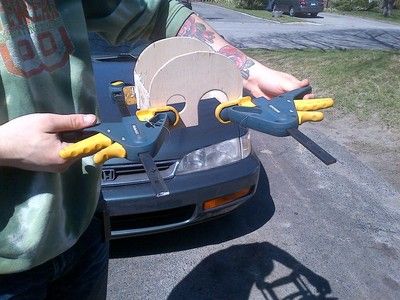
My boyfriend hurried to surprise me and glue the house together so I didn't get to take pictures of the house apart.This is the house during the gluing process. He used the clamps to hold the house together and make sure it will glue properly as non-toxic pet friendly glues don't have all those chemicals that make the glue dry in 2 minutes. Drying took about 6-7 hours.
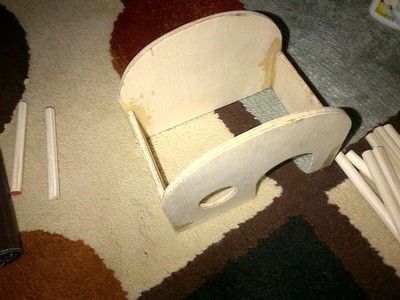
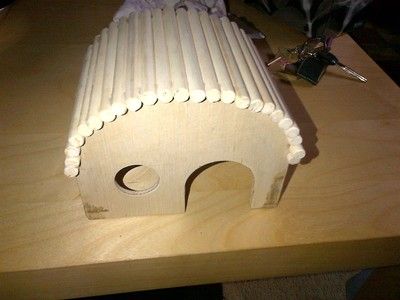
After the glue dried, we removed the clamps and used sand paper to remove any remaining glue.
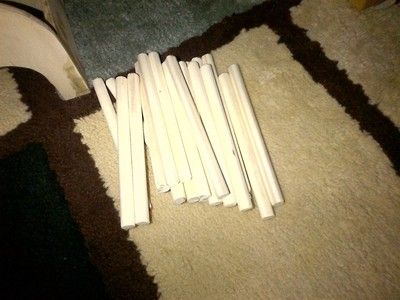
These are the sticks we used for the roof. Basically I had 4 long sticks that I cut into smaller equal(more or less) pieces. We then made grooves in the sticks so that they would not roll off the house while the glue is drying.
This is the house with the roof on. We placed some tape over the roof so it would hold in place and glue properly. The grooves were only made the ease their placing on the house but we still have to secure the roof until the glue dried.
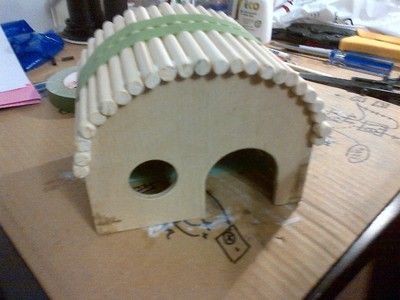
Anndddddd TA-DAAAA!!! This is the final result.
I still need to paint it, but will do so only later today as I have a doctor appointment and I still need to sand the remaining glue and also sand so the paint adheres to the wood.


 Linear Mode

