 |
|
Navigation
|
|
Front Page |
|
Forum |
|
Gallery |
|
Wiki |
 |
|
 02-25-2012, 12:33 PM
|
#1
|
|
Senior Hamster
Join Date: Jun 2011
Location: England
Posts: 554
|
 Detolfs for robos and hybrids
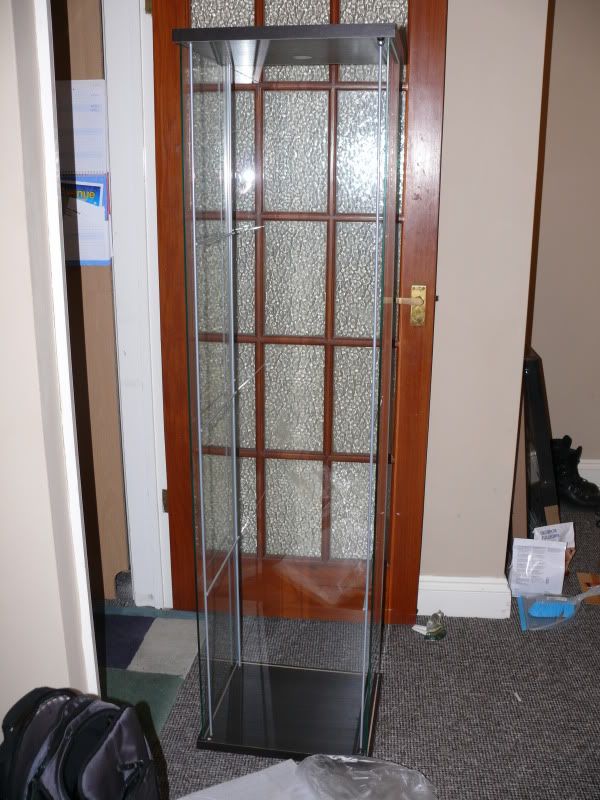
So, yesterday we picked up the two Detolfs, and I thought to myself, it'd be nice to have a step-by-step making with photos (I haven't seen one yet), so here goes. Don't expect it to be fast, just buying them broke the bank a little  Combined with only having weekends for building time, and March being a bit busy with symposiums. But we'll get there, and it will be worth it...so!
Step one, buy some Detolfs Then spend at least one day groaning about how extremely heavy they are to carry. And how long - I spent the drive home with my seat all the way up, and all the way forward, at some odd angle facing towards the window It was totally worth it!

|

|

|
|
02-25-2012, 12:38 PM
|
#2
|
|
PM Fluffy for custom title
Join Date: Nov 2010
Location: Newcastle-Under-Lyme
Posts: 3,350
|
Re: Detolfs for robos and hybrids
Looking forward to this,
|
|
|
|
|
02-25-2012, 01:07 PM
|
#3
|
|
Senior Hamster
Join Date: Jun 2011
Location: England
Posts: 554
|
Re: Detolfs for robos and hybrids
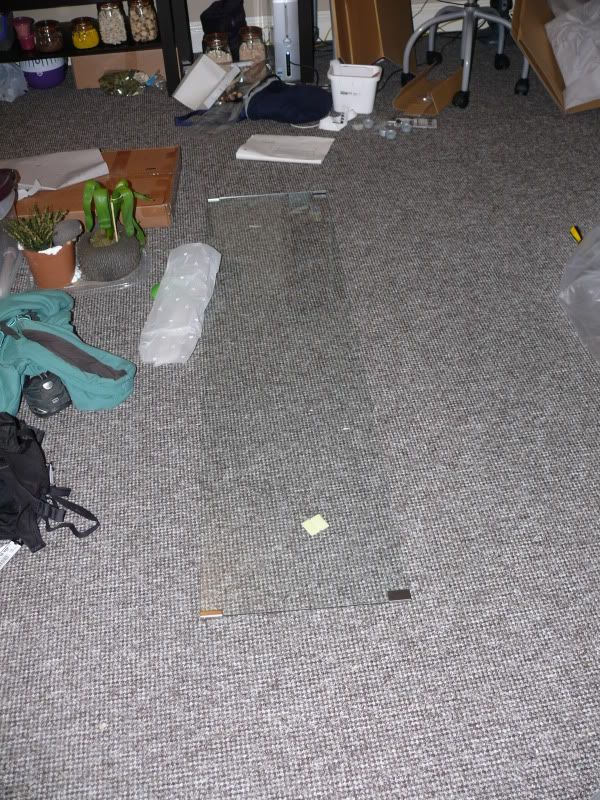
Might get Step 2: The Unpacking in about 30 mins. Apparently my engineer needs some time to let his dinner go down before he tackles that.
I also forgot to mention, the things on top, the two boxes are Dioder colour-changing light strips (Ikea again), and the orange thing is my two silent spinners that finally arrived today And the sticky thing on the left hand side is the edging for shelves/platforms
We're currently working out whether we want to use the glass doors as lids (adding holes for ventilation), or whether we want to do either a flat or domed lid. I quite like the idea of the glass, it'd look nicer. But cutting it will be a pain. We'll probably try with one lid, if it shatters, no loss, if it works, then we'll see how that goes with Nimh's first
|
|
|
|
|
02-25-2012, 04:43 PM
|
#4
|
|
Senior Hamster
Join Date: Jun 2011
Location: England
Posts: 554
|
Re: Detolfs for robos and hybrids
Step 2: The Unpacking (and apologies for messy sitting room!)
Rustled up the Engineer and got him into position to start unpacking and building.
We're also still considering using the glass door and adding holes to it for vents, so we put that together too, but haven't actually built it onto the detolf yet - no point if we'd only have to take it off again to do the holes
This is the one thing I know I'd have been interested to see done before us Current plan is a large (but too small for Nimh to squish through) ceramic grinding drill bit, and then somehow smooth it afterwards - a task for weekend after next when we get the power tools out!
Also let Nimh have a bimble around it...she seemed keen to explore
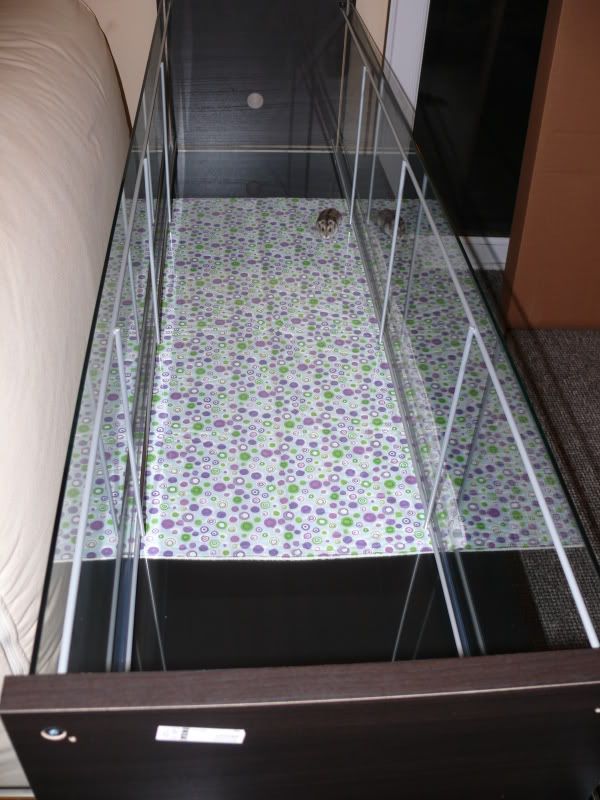

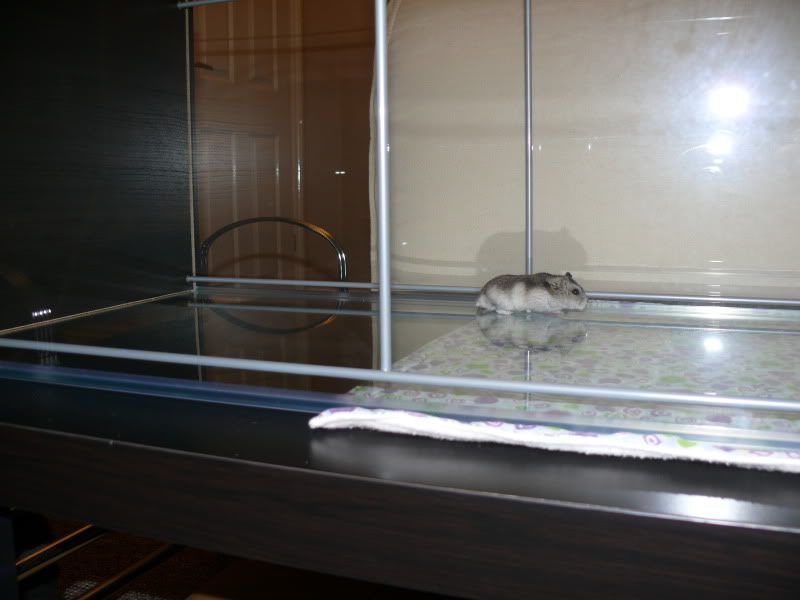
Thing underneath that is purple and lime polka dots is one of Bodhi's ZZ2 liners - so (stating the obvious a bit here!) fits in the 100cm long ZZ2 for size comparison (for you guys ), but for us, we wanted something under the glass to support it - currently mulling over using cork coasters for that task in the long term.
Week after next is drilling holes in the glass lid, super-gluing the plastic plug in place, and sealing the edges. Also hopefully get down to B&Q for some wood supplies As well as wash, disinfect, bake and select Nimh's river rocks.
Keep an eye out for Step Three: How to unstick the Engineer from the super-glued plug 
|
|
|
|
|
02-25-2012, 04:53 PM
|
#5
|
|
Senior Hamster
Join Date: Jun 2011
Location: England
Posts: 554
|
Re: Detolfs for robos and hybrids
Forgot to add, with this Lack coffee table, we lowered the shelf by 4 cm compared to how they should be put together. I bought two packs of clip-lock jars from Tesco (2 large, 2 medium, 2 small in a pack) which can be seen in the 2nd photo, to put my nibbles in (plastic zip-lock bags looked a bit meh!). But the biggest ones didn't quite fit on the shelf. So going to have the 4 bigger ones under our slightly adjusted new table, and the 8 smaller ones under the normally-put-together older table.
So far, I'm impressed with the size. When it was standing up, it looked tiny in comparison to my Perfecto - once on it's back, it looks much bigger - I am looking forward to the stage after next (the B&Q run ), and have a few good ideas for kitting it out
|
|
|
|
|
02-25-2012, 04:55 PM
|
#6
|
|
PM Fluffy for custom title
Join Date: Apr 2011
Location: Colorado, USA
Posts: 1,811
|
Re: Detolfs for robos and hybrids
It looks great!!
On a side note, my Nim and your Nimh, look seriously similar :P
|
|
|
|
|
02-25-2012, 05:16 PM
|
#7
|
|
Senior Hamster
Join Date: Jun 2011
Location: England
Posts: 554
|
Re: Detolfs for robos and hybrids
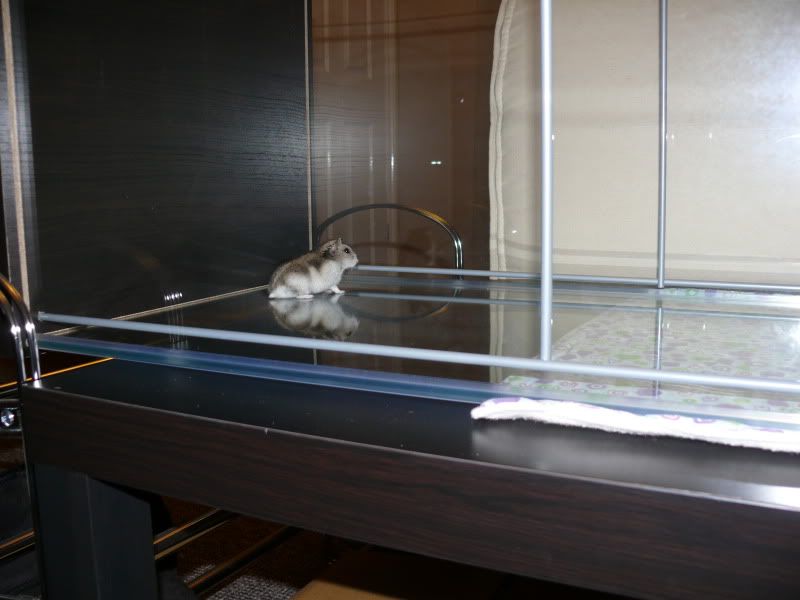
Must be a 'Nimbles' gene She has really put on a lot of chub since she arrived. When I got her she was really skinny. She's filled out and grown quite a bit over the past couple of weeks - she looks much healthier now, although I have had a few worries about her being pregnant (don't trust the pet shops round here!) since she's carrying a lot on her hips/bum, but I think I am probably paranoid!
She didn't seem terribly concerned about the 'drop off'. At one end, there is about 8cm of glass not resting on the tables - she was waddling all over it without looking down. Huzzah for short-sighted hammies Won't be too bad once substrate is in, but I was slightly concerned it'd worry her...I worry too much
|
|
|
|
|
02-26-2012, 05:55 AM
|
#8
|
|
Roebuck Hamstery
Join Date: Jun 2011
Location: London!! Im home!
Posts: 2,867
|
Re: Detolfs for robos and hybrids
this is going to be great!!! i love the size of the detolf, wish i coud do it but having this many itl be crazy haha!!
|
|
|
|
|
02-26-2012, 08:33 AM
|
#9
|
|
Adult Hamster
Join Date: Dec 2011
Location: Austria
Posts: 308
|
Re: Detolfs for robos and hybrids
Wow, looks great. I curious to hear how the glass drilling works out, nobody ever tried that yet. It sure would look good but I imagine it'll be a lot of work as you really need many many holes for the thing to be well ventilated.
|
|
|
|
|
02-26-2012, 09:39 AM
|
#10
|
|
Senior Hamster
Join Date: Jun 2011
Location: England
Posts: 554
|
Re: Detolfs for robos and hybrids
Quote:
Originally Posted by vanilla-yazoo

this is going to be great!!! i love the size of the detolf, wish i coud do it but having this many itl be crazy haha!!
|
I'm definitely impressed with the Detolf so far, it does need a fair amount doing to it (lid, sealant, levels/breaks, etc), but the size for the price is not half bad for a semi-DIY job! Definitely a good one for a starter-course for Hamster Cage DIY
Quote:
Originally Posted by TheFeldhamster
Wow, looks great. I curious to hear how the glass drilling works out, nobody ever tried that yet. It sure would look good but I imagine it'll be a lot of work as you really need many many holes for the thing to be well ventilated.
|
The reason we are going to try the glass drilling is that nobody else has tried it yet. At worst, we smash both doors, and have glass on the patio to sweep up. At best, it'd look very smooth and stream-lined and give perfect vision through the top of the cage as well as the sides. As well as allowing me to easily drop things through the holes in the way of sneaky air-dropped treats Our other thought was to strip out the middle of the pane of glass, and replace it with wire mesh, but attaching the wire mesh to glass has been deemed 'too hard' by the Engineer. I figured glue gunning it would work, but he thinks it won't stick properly, and will look naff. The other option is getting a piece of perspex the same dimentions as the door, and drilling/meshing that, which would be much easier than the glass, but look very similar. The company we bought Bodhi's perspex for her pen did a fab job, they smooth all edges, drill holes for you, and cut to size, and it wasn't extortionate for the amount of work gone into it and sheer amount of materials.
Either way, the door is something that is going to be something we'll try a few things for probably. I was going for the domed (two corner shelf style) lid, but it'd look a bit odd, and currently, the tank is the same height as the sofa - so for aesthetics, I'd rather not do that (although we'll have to see how the wheel height goes).
If we try perspex, it is no big whoop since we're already planning on using that to make a few subdivisions - after being utterly confused by what wood we can and can't use, the Engineer has said if I'm worried, we'll do perspex instead. From what I've read, MDF, Plywood (except Poplar, and UK ply isn't labeled with regards to type of wood it comes from) and Chipboard are all on the no-no list (or they are equally represented as 'bad' by the few lists I've read, some not appearing as bad in some, but all of them cropping up in the bad list). Combined with perspex being see-through, drownable for washing/disinfecting purposes, and fairly unscratchable (Bodhi's is pretty much pristine, and she runs along it/wriggles backwards against it with her quills which are a lot sharper and stronger than any ham claws!).
Either way, definitely not looking back. OH is due to seal it all next weekend while I'm away, then the weekend after, we'll start work on the subdivisions, lid, and so forth.
Currently, I'm looking for a list of safe plants I can pop in there in flower pots.
|
|
|
|
|
|
 Posting Rules
|
You may not post new threads
You may not post replies
You may not post attachments
You may not edit your posts
HTML code is Off
|
|
|
|
Powered by vBulletin®
Copyright ©2000 - 2024, Jelsoft Enterprises Ltd.
|
All times are GMT -7. The time now is 10:49 PM.
|
|
|
|


 Linear Mode
